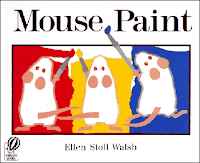
 To begin this project, I use the first day to talk about the color wheel and "color clubs". We start by reading the book "Mouse Paint" by Ellen Stoll Walsh and talk about how primary colors (red, yellow, and blue) can be used to mix the secondary colors (purple, orange, and green)!
 We review this idea of color mixing over and over and it is reinforced constantly throughout the project. We look at blending the primary colors (and talk very briefly about intermediate colors), mixing them (in my magical color mixing bowl!), we watch a video I made of me mixing the colors using food coloring (link to it here), and finally we complete a "color math" worksheet by using primary-colored transparency math chips and holding them up to the light to check our answers.
On the second day we look at artwork made by Robert Delaunay and Sonia Delaunay and talk about how they created abstract works of art that really focused on color! I have students make guesses as to what they think the artists were thinking about when they created their works of art. I get a lot of different responses with this - which helps us to understand that abstract art can be interpreted in many different ways because it doesn't look exactly like a photograph - it's not completely realistic! After looking at the artwork, I show students the tissue paper collage hanging in my window. We talk about how it is abstract because it only kinda looks like something (kinda like a bird!). I tell them I created it only using primary colors. *I also have a tissue paper collage depicting a rainbow also in my window that was only created with primary colors.
Then we recap coloring mixing a final time by talking about how we can create secondary colors by layering primary-colored tissue papers. I demo the process for students and then we get started!
 *Project setup: I pre-cut black construction paper to create frames for my kids - these are passed out first. The kids use construction paper crayons to write their name on the back of their frame. Then I pass out transparency sheets - these are placed under our frames (they kinda look like tv's at this point - which the kids love to point out). :) Then I pass out a sheet of cardboard which is put underneath everything. This is just a board to work over - not part of the final piece (it makes it easier to carry to the drying rack).
Students are instructed to use the primary-colored tissue paper on their tables, rip it into smaller pieces, and glue them using watered-down glue and paint brushes onto their transparency paper AND frame. Yes... you have to glue pieces that lay on both! This holds our artwork together because when it is dry, I remove the transparency paper from the back (it is reused for the next class). If the project is dry, it peels right off with no problem!
If you would like a more thoroughly written lesson with all the necessary resources, check out my store!


