

We begin by talking about what a mandala is, how it has radial symmetry, and even watch an amazing video clip I found on YouTube of some Tibetan monks creating one with sand (the video clip is a must - it puts the kids in awe).
I tell the kids that the radial symmetry found in the mandala will be the inspiration for our very own printmaking project! Then we look at an amazingly awesome PowerPoint I put together to show students how to properly create their printmaking plates so that when rotated and printed, it will create a print which shows radial symmetry.
 After viewing the PowerPoint, each student gets a piece of graph paper which has 3- 2"x2" areas blocked out (this is the size of the Styrofoam printmaking plate they will make). I leave 3 blank squares so that they can make a couple sketches for their plate and choose their favorite. Students are instructed to pick a corner which they will design around. Then they begin adding lines and shapes to their paper. I explain that any line that they start at an edge must connect to the adjacent edge at the same distance from the corner they are working towards (I know this sounds confusing - which is why I rely on the PowerPoint and the grid to visually show students).
Once students select their favorite sketch, I give them a piece of 2"x2" Styrofoam which they place over their favorite sketch. Then using a dull pencil, students trace their design onto their Styrofoam. Using a sharpie marker, students gently write their name on the back of their stamp when done, and attach an opened paperclip to the back with a piece of tape (to create a handle).
With some of my groups, I had them paint a background for their printmaking paper with liquid watercolors, but with other groups this just wasn't an option because of time. Either way though, students printed their designs onto an 8"x8" paper (so they stamped a total of 16 times).
Students used brayers to evenly roll black tempera paint (or black printing ink) onto a piece of plexiglass, then pressed their stamps into the paint.
The students really get into this project, and I think it's because of the zen effect completing radially symmetric prints creates.


Even students who either messed up a bit on their prints or their stamp-making got really beautiful results too! :)

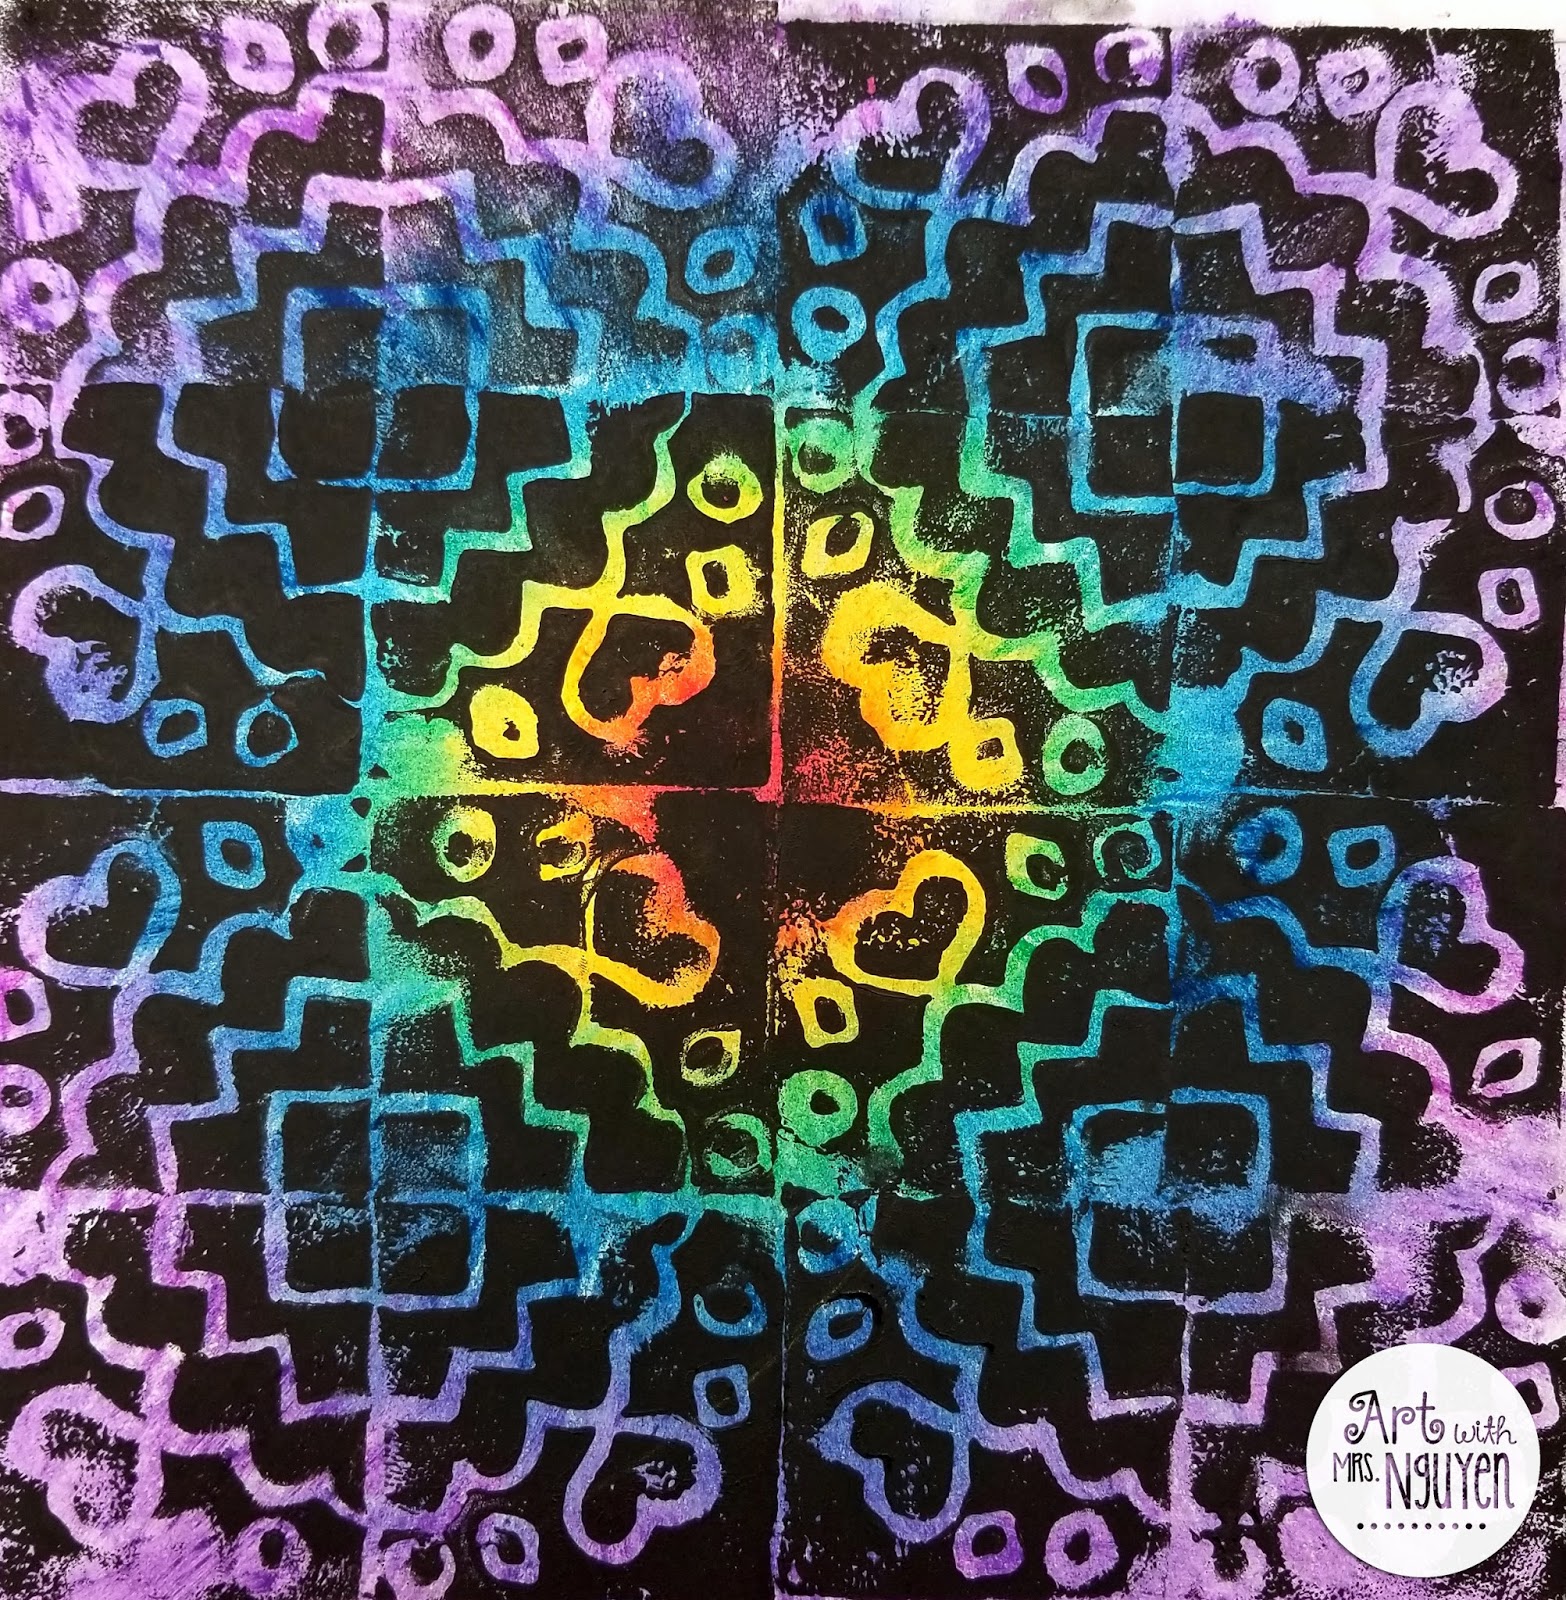
Another great alternative is to color oil pastel on your paper before printing! Check out how vibrant this is!


Also available in my Teachers Pay Teachers store.
These are really great!!
ReplyDeleteThanks! :) I agree! And the kids had such a blast doing them!
ReplyDeleteJust did these with my 6th grade student and they came out so beautiful--I'll take a picture of the finished bulletin board and send it to you soon. Thanks for sharing this lesson! Mrs. P @ createartwithme.blogspot.com
ReplyDelete